pshot
Product shots of your work, made by your AI agent.
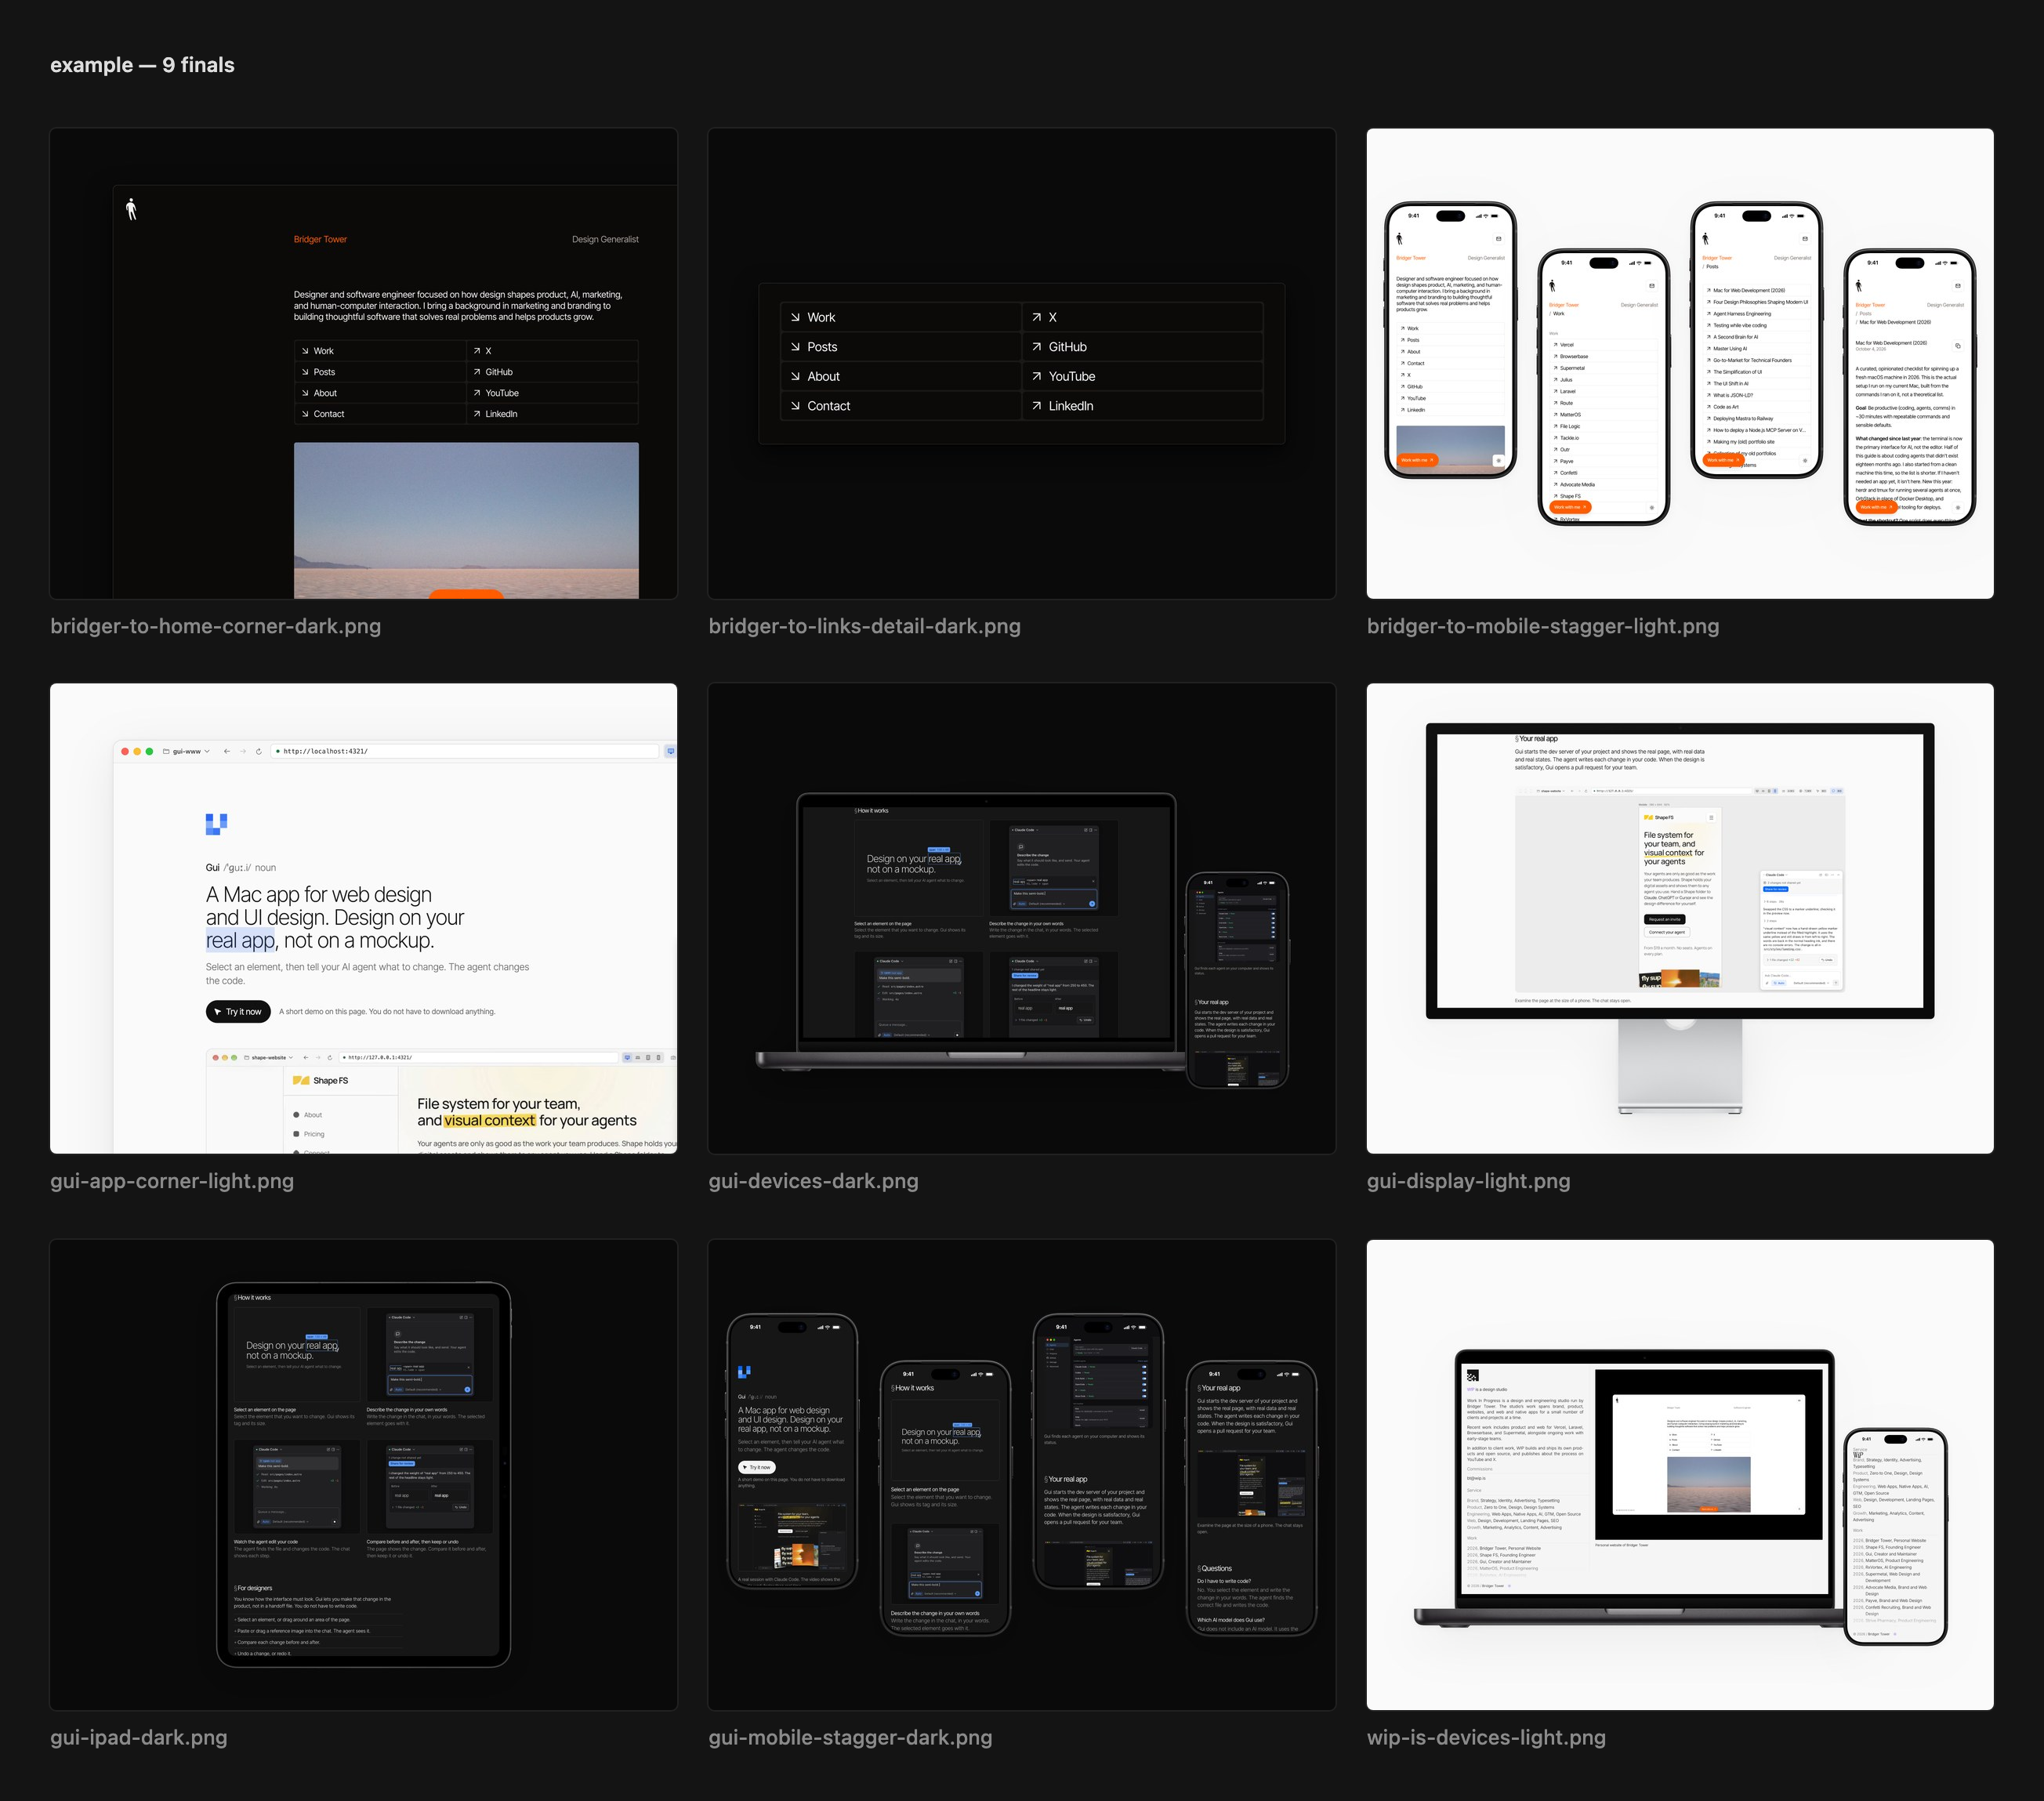
pshot captures websites, local dev servers, Figma frames, and Mac/iOS apps, then composes them into high-resolution product shots and short scroll videos. It's opinionated on purpose: near-black and off-white canvases, 4:3 at 3200×2400, every shot in both dark and light, minimal framing or real Apple device frames, and never an upscaled pixel. It's built to be driven by an AI agent (it ships a Claude Code skill), and works just as well by hand.
Install
curl -fsSL https://pshot.dev/install | bash
This installs Bun and ffmpeg if needed, clones pshot to ~/Projects/pshot (set PSHOT_DIR to change
that), installs Chromium, downloads Apple's product bezels from Apple's Design Resources, links the global
pshot command, and installs the Claude Code skill. Downloading the bezels accepts Apple's bezel license;
set PSHOT_SKIP_BEZELS=1 to skip it and use CSS frames instead. Re-run the same command to update.
Requirements. macOS. Websites and Figma work out of the box. Mac app capture needs Screen Recording
permission for your terminal and the Xcode Command Line Tools (xcode-select --install). iOS capture needs
Xcode with a Simulator. Figma exports need a FIGMA_TOKEN in ~/Projects/pshot/.env.
Use it with your agent
With the skill installed, ask Claude Code from any project:
take product shots of https://your-site.com
The agent scouts the site, writes a recipe, renders every shot in dark and light, reviews the results, and shows you a contact sheet before delivering anything.
Use it by hand
cd your-project
pshot init https://your-site.com   # writes ./shots.yaml
pshot                              # renders every shot, dark + light
pshot --shot home --reuse          # iterate on one shot without recapturing
pshot --out public/work            # also copy the finals into this project
Finals and a contact sheet are written to pshot's own folder, ~/Projects/pshot/output/<project>/.
--out copies them into your project as well.
A recipe is a list of shots. Each one has a source and a layout:
project: my-site
defaults:
  web: { url: https://my-site.com, viewport: 1280x800 }

shots:
  # The page, unframed.
  - id: home
    source: { type: web }
    layout: single

  # Big UI running off the right and bottom edges.
  - id: close-up
    source: { type: web }
    layout: bleed
    options: { edge: corner, zoom: 1.4 }

  # MacBook + iPhone, a different page on each.
  - id: devices
    sources:
      - { type: web, frame: macbook }
      - { type: web, url: https://my-site.com/work, frame: iphone }
    layout: duo

  # A Figma frame, exported at 4×.
  - id: figma
    source: { type: figma, url: "https://figma.com/design/FILE/NAME?node-id=1-2" }
    layout: single

  # The booted iOS Simulator, with a clean 9:41 status bar.
  - id: ios
    source: { type: ios, url: https://my-site.com, frame: iphone }
    layout: single

  # A smooth 60fps scroll video.
  - id: scroll
    source: { type: web, frame: iphone }
    layout: single
    motion: { kind: scroll, duration: 5, to: "#work" }
Layouts: single, detail, bleed, duo, row, grid, stagger.
Frames: iphone, ipad, macbook, display.
Device screens are always filled exactly, and nothing is ever upscaled: web captures re-render at the density each layout needs, and QA flags anything that would be soft or cropped.
Every option is in docs/recipes.md.
License
MIT. Apple's product bezels are not included in this repository. They are downloaded from Apple and are subject to Apple's terms.